Tamiya Bruiser Clone Build Part 4.
(Black Dye Parts,Metal Decals, Tires & Wheels).

Hello again and thanks for joining me for the last stages and the final post of this build.
If you have not read the previous Bruiser Clone Build posts
Part 1 is here.
Part 2 is here.
Part 3 is here.
There is also a video available on YouTube demonstrating other accessories and upgrades.
It is one calender month today since I started this project. I am really pleased it is finally (never) finished.
In this final part, I will mostly be showing pictures of the wheels and decals.
Since Part 3, I have painted the interior, painted the mirrors, dyed the bumpers, painted the side rails and fitted the light lenses. It was pointless showing you what I was doing as I was simply gluing or screwing on parts, so instead I will simply show you the results.
OK, here we go.
I removed the chrome from the mirrors, side rails and rear cab. I painted the mirrors and the side steps matt black as they would not take on the dye, at all!!! The rear body mount, servo arm and both bumpers came out of the dyeing process perfectly and looked like they came from the factory. I was really happy with the outcome.

The above picture shows the parts before the dyeing process.

And after dyeing. I used the Rit powder dye for these and it can be found here. The parts to the left are the parts that the dye would not take to. It was really shiny plastic. I resorted to painting those parts and they came out very well.

Above is a picture of the alloy side and front Toyota emblem's. These motifs are not self adhesive so I had to be really careful with the super glue when attaching them.

Above shows the right hand side motif glued in the correct position. Yes they are tiny but I am trying to recreate a true scale model of the Hilux. The motif's can be found here.
It was now time to fit the dye and painted parts.

The above picture shows the freshly painted mirrors and side bars. I think they match the flared wheel arches a treat so I'm very happy there. I have also fitted all the light lens covers.

You can see in the above picture where the correct (so I'm led to believe) position of the from Toyota alloy emblem.
The interior of the truck is very simply to assemble and paint, depending on how much detail or work your willing to put in. At this point I will be leaving it "acceptable for now" and can easily be further detailed at a later date.

These are 5 stud, 8 spoke alloy and weighted four piece wheel set, know as a bead lock wheels and can be found here at a very reasonable price. They are also very heavy, weighing in at a mighty 107 gram each without a tire or foam insert. see below.

By fitting these wheels, I will be adding 428 grams to the truck. The wheels are designed to be heavy to keep then wheels grounded and also to lower the centre of gravity. The heavy wheel also aids in rock crawling as it has a heavy rotating mass to keep the wheels turning. This also removes the need to have brass wheel weights added, which are quite expensive.


The picture above shows an assembled wheel on the right, and the four parts of an unassembled wheel to the left. Above the wheels are the injora Super Swamper tires and foam inserts.

ABOVE
A wheel and tire ready to be assembled.

Ensure the foam insert is seated correctly and insert the heavy inner alloy ring into the tyre.

As shown above.

Insert the deep dish into the rear of the tire.

Like so...

Add the front outer dish onto the front of the wheel and add the metal bolt retainer at the rear. I can now add all the bolts and tighten in sequence to ensure the tire and rim are bonded correctly.

.These four wheels and tires actually took me two hours to complete, so I'm no Quick Fit.....

This is how the rear of the tire and wheel assemblies should look when done correctly. They do not allow air in or out, so they are water tight just like a real car tire. COOL... Please ignore the date on the clock in the back ground as it is incorrect. Today is 6/8/2020. The temperature however is correct, nice and cool.
With all four wheels and tires assembled, it was time to get them on the truck...

Looking good from my point of view.

I may add/remove some decals. Not sure?

A have a lot more articulation with the modified suspension, new wheels and tires. You can see how soft those tires are, moulding around the terrain, with all four wheels on the ground. Looking real good.

Excellent rear chassis articulation at the rear. This will be higher with a full compliment of electronics, servo's and a big battery.

More decals and a look at the interior.

More articulation......

And a final picture (for now), with my Optima wheels in the trunk..
And on that last picture I have shared, I am finished for now. I have spent many hours every day since 6/7/2020, so I am happy (at the moment) to say it's finished...
So with that said, thank you for reading my humble words and I hope this helps you decide if you want to add a HG-P407 Tamiya Bruiser clone to your collection. I hope you do!!
Take care and stay safe.
catxls.com
6/8/2020

And after dyeing. I used the Rit powder dye for these and it can be found here. The parts to the left are the parts that the dye would not take to. It was really shiny plastic. I resorted to painting those parts and they came out very well.

Above is a picture of the alloy side and front Toyota emblem's. These motifs are not self adhesive so I had to be really careful with the super glue when attaching them.

Above shows the right hand side motif glued in the correct position. Yes they are tiny but I am trying to recreate a true scale model of the Hilux. The motif's can be found here.
It was now time to fit the dye and painted parts.

The above picture shows the freshly painted mirrors and side bars. I think they match the flared wheel arches a treat so I'm very happy there. I have also fitted all the light lens covers.

You can see in the above picture where the correct (so I'm led to believe) position of the from Toyota alloy emblem.
The interior of the truck is very simply to assemble and paint, depending on how much detail or work your willing to put in. At this point I will be leaving it "acceptable for now" and can easily be further detailed at a later date.

These are 5 stud, 8 spoke alloy and weighted four piece wheel set, know as a bead lock wheels and can be found here at a very reasonable price. They are also very heavy, weighing in at a mighty 107 gram each without a tire or foam insert. see below.

By fitting these wheels, I will be adding 428 grams to the truck. The wheels are designed to be heavy to keep then wheels grounded and also to lower the centre of gravity. The heavy wheel also aids in rock crawling as it has a heavy rotating mass to keep the wheels turning. This also removes the need to have brass wheel weights added, which are quite expensive.
Time to fit the tires to the wheels.
I chose injora once again for my tire choice. I settled on the Super Swampers.

The tires can be found here and are excellent value for money. They are super soft tread and high tire walls to achieve maximum grip in the most extreme terrain and conditions. These tires have a 1.9" (inch) inner diameter. The wheels have a 1.9" (inch)outer diameter. Perfect match.
It was now time to mount the tires on the wheels......

The picture above shows an assembled wheel on the right, and the four parts of an unassembled wheel to the left. Above the wheels are the injora Super Swamper tires and foam inserts.

ABOVE
A wheel and tire ready to be assembled.

Ensure the foam insert is seated correctly and insert the heavy inner alloy ring into the tyre.

As shown above.

Insert the deep dish into the rear of the tire.

Like so...

Add the front outer dish onto the front of the wheel and add the metal bolt retainer at the rear. I can now add all the bolts and tighten in sequence to ensure the tire and rim are bonded correctly.

.These four wheels and tires actually took me two hours to complete, so I'm no Quick Fit.....

This is how the rear of the tire and wheel assemblies should look when done correctly. They do not allow air in or out, so they are water tight just like a real car tire. COOL... Please ignore the date on the clock in the back ground as it is incorrect. Today is 6/8/2020. The temperature however is correct, nice and cool.
With all four wheels and tires assembled, it was time to get them on the truck...

Looking good from my point of view.

I may add/remove some decals. Not sure?
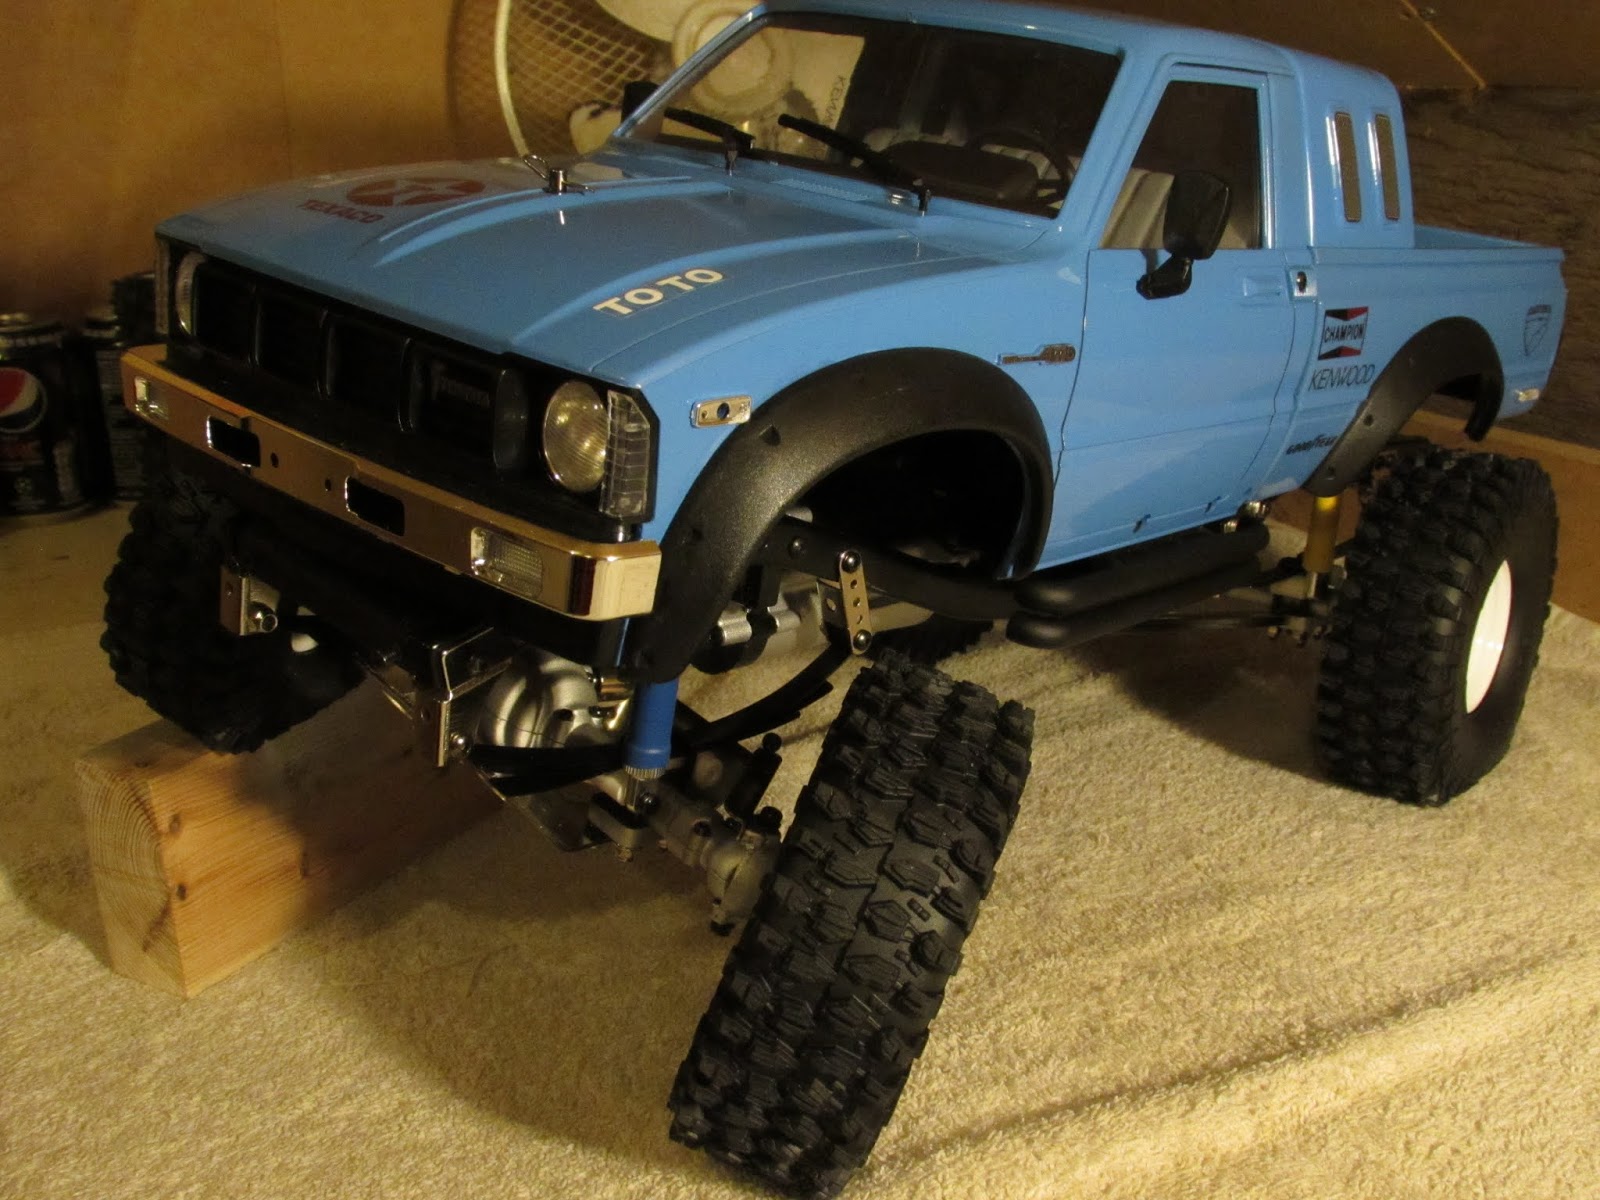
A have a lot more articulation with the modified suspension, new wheels and tires. You can see how soft those tires are, moulding around the terrain, with all four wheels on the ground. Looking real good.

Excellent rear chassis articulation at the rear. This will be higher with a full compliment of electronics, servo's and a big battery.

More decals and a look at the interior.

More articulation......

And a final picture (for now), with my Optima wheels in the trunk..
And on that last picture I have shared, I am finished for now. I have spent many hours every day since 6/7/2020, so I am happy (at the moment) to say it's finished...
So with that said, thank you for reading my humble words and I hope this helps you decide if you want to add a HG-P407 Tamiya Bruiser clone to your collection. I hope you do!!
Take care and stay safe.
catxls.com
6/8/2020
Comments